Shop
The shop lets players spend their in-game currency on items, roles and other perks. Each game server has its own shop. Players buy on a web storefront or in game.
Before you start
Section titled “Before you start”- Turn on the economy for the server. Prices are paid in its currency. See Economy.
- Install economyUtils if players should use the shop in game. It adds
/shopand/claim. See Modules. - Make sure items are synced. Open your server → Items → Catalogue. If you see your game’s items, you are ready.
Managing the shop needs the Manage Shop Listings permission.
Want help? On an empty shop, click Set up the shop with Takaro AI. Takaro AI asks what you want to sell and for how much, then creates the first listings.
Shop pages
Section titled “Shop pages”Open your server in the sidebar, then Shop:
| Page | What it’s for |
|---|---|
| Storefront | Your listings: create, edit, publish, reorder, import and export. |
| Orders | Every purchase on this server and its status. |
| Categories | Groups that players browse by. |
| Automations | Shop actions from your installed modules. |
| Storefront settings | The look and the web address of your storefront. |
Create a listing
Section titled “Create a listing”- Go to Shop → Storefront and click New Listing.
- Enter a Name and a Price.
- Add what the player gets. Pick one:
- Items: add items with a Qty and, where the game has it, a Quality. Use Load set to add a saved item set.
- Shop Action: run an automation instead, like granting a role. A listing sells items or an action, not both.
- Choose the Delivery:
- Instant: delivered at purchase if the player is online. Otherwise they claim it later.
- Claim in game: the player claims the order while online.
- Optional settings:
- Categories and a Storefront image (PNG, JPEG, WEBP or GIF, max 5 MB). Without an image, the first item’s icon is shown.
- Purchase limits: Per player, ever, or Per player, per period with Resets every day, week or month.
- Limited stock: how many are for sale in total.
- Available from and Available until: a sale window. Outside it, the listing is visible but can’t be bought.
- Visible to roles: only players with these roles see the listing. Leave empty to show it to everyone.
- Required player variable: only players with a matching value can buy. For example, a streak of at least 7 written by dailyRewards.
- Sort Order: lower numbers come first.
- To hide it while you work, turn on Draft (hidden from players).
- Click Create.
Listings show as Live or Draft. Use Publish and Unpublish to switch.
Copy a shop
Section titled “Copy a shop”- Import from server: copy listings from another server of the same game.
- Export listings and Import from file: save listings as a JSON file and load them elsewhere. Images aren’t included, so upload them again.
Both imports can add listings as drafts, or replace the whole shop. If any listing fails during a replace, the original shop is restored.
Use Reorder to drag listings into the order players see them.
Categories
Section titled “Categories”Shop → Categories → New Category. Give it a Name, an optional Emoji and an optional Parent Category for sub-categories.
Categories are shared across all servers in your community. Deleting a category moves its sub-categories to the top level.
Automations
Section titled “Automations”Shop → Automations lists every shop action your modules provide. A shop action is code that runs when a player buys a listing.
The built-in shopActions module adds four:
| Action | What it does |
|---|---|
grantRole |
Gives the buyer a Takaro role, for example VIP. |
sendMessage |
Sends a message to the buyer, or to everyone. |
giveItem |
Gives extra items. |
executeCommand |
Runs a console command on the game server. |
Set each action up in the module’s config on the server, for example which role grantRole gives. In System Config, choose when it runs: when the order is created, when it is claimed, or both.
If the module is uninstalled or disabled, listings that use its actions show as Unavailable and can’t be bought.
Orders
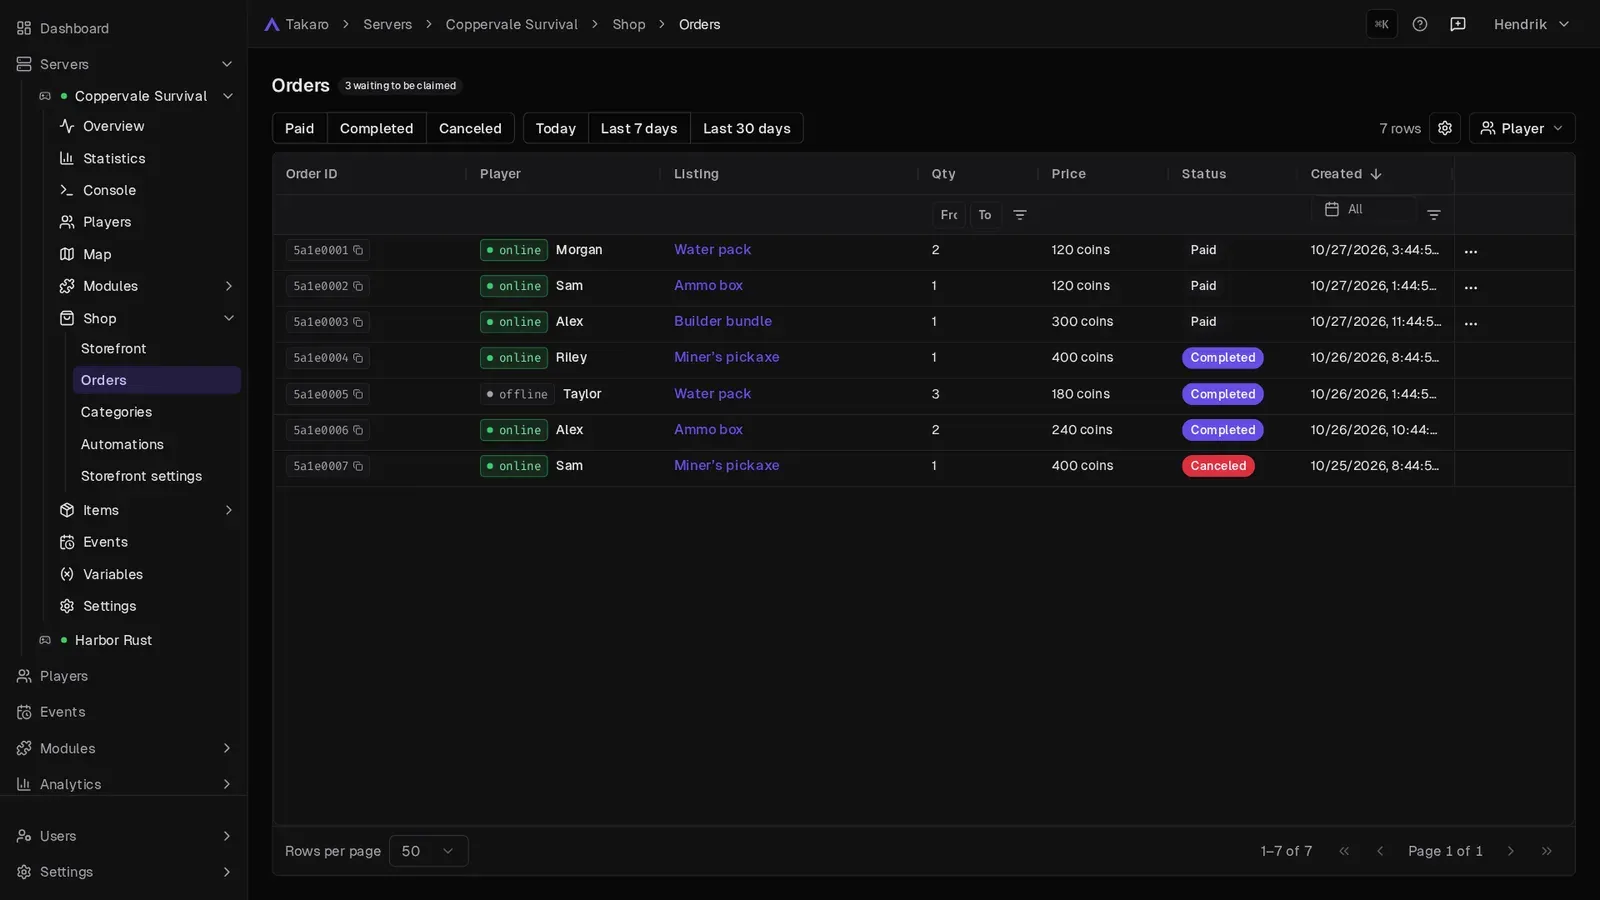
Section titled “Orders”Shop → Orders shows every order with its player, listing, quantity, price and status. Filter by player or time.
| Status | Meaning |
|---|---|
| Paid | The player paid. The order is waiting to be claimed. |
| Completed | The order was claimed and delivered. |
| Canceled | The order was canceled and the player was refunded. |
What you can do with a Paid order:
- Claim: sends the items to the player in game now. The player must be online.
- Cancel Order: refunds the player the listing’s current price times the quantity. If you changed the price since, that’s not what they paid. If the listing has limited stock, the stock goes back up. This can’t be undone.
Players claim their own orders in game with /claim, or with Claim on the storefront while they are on the server.
The storefront
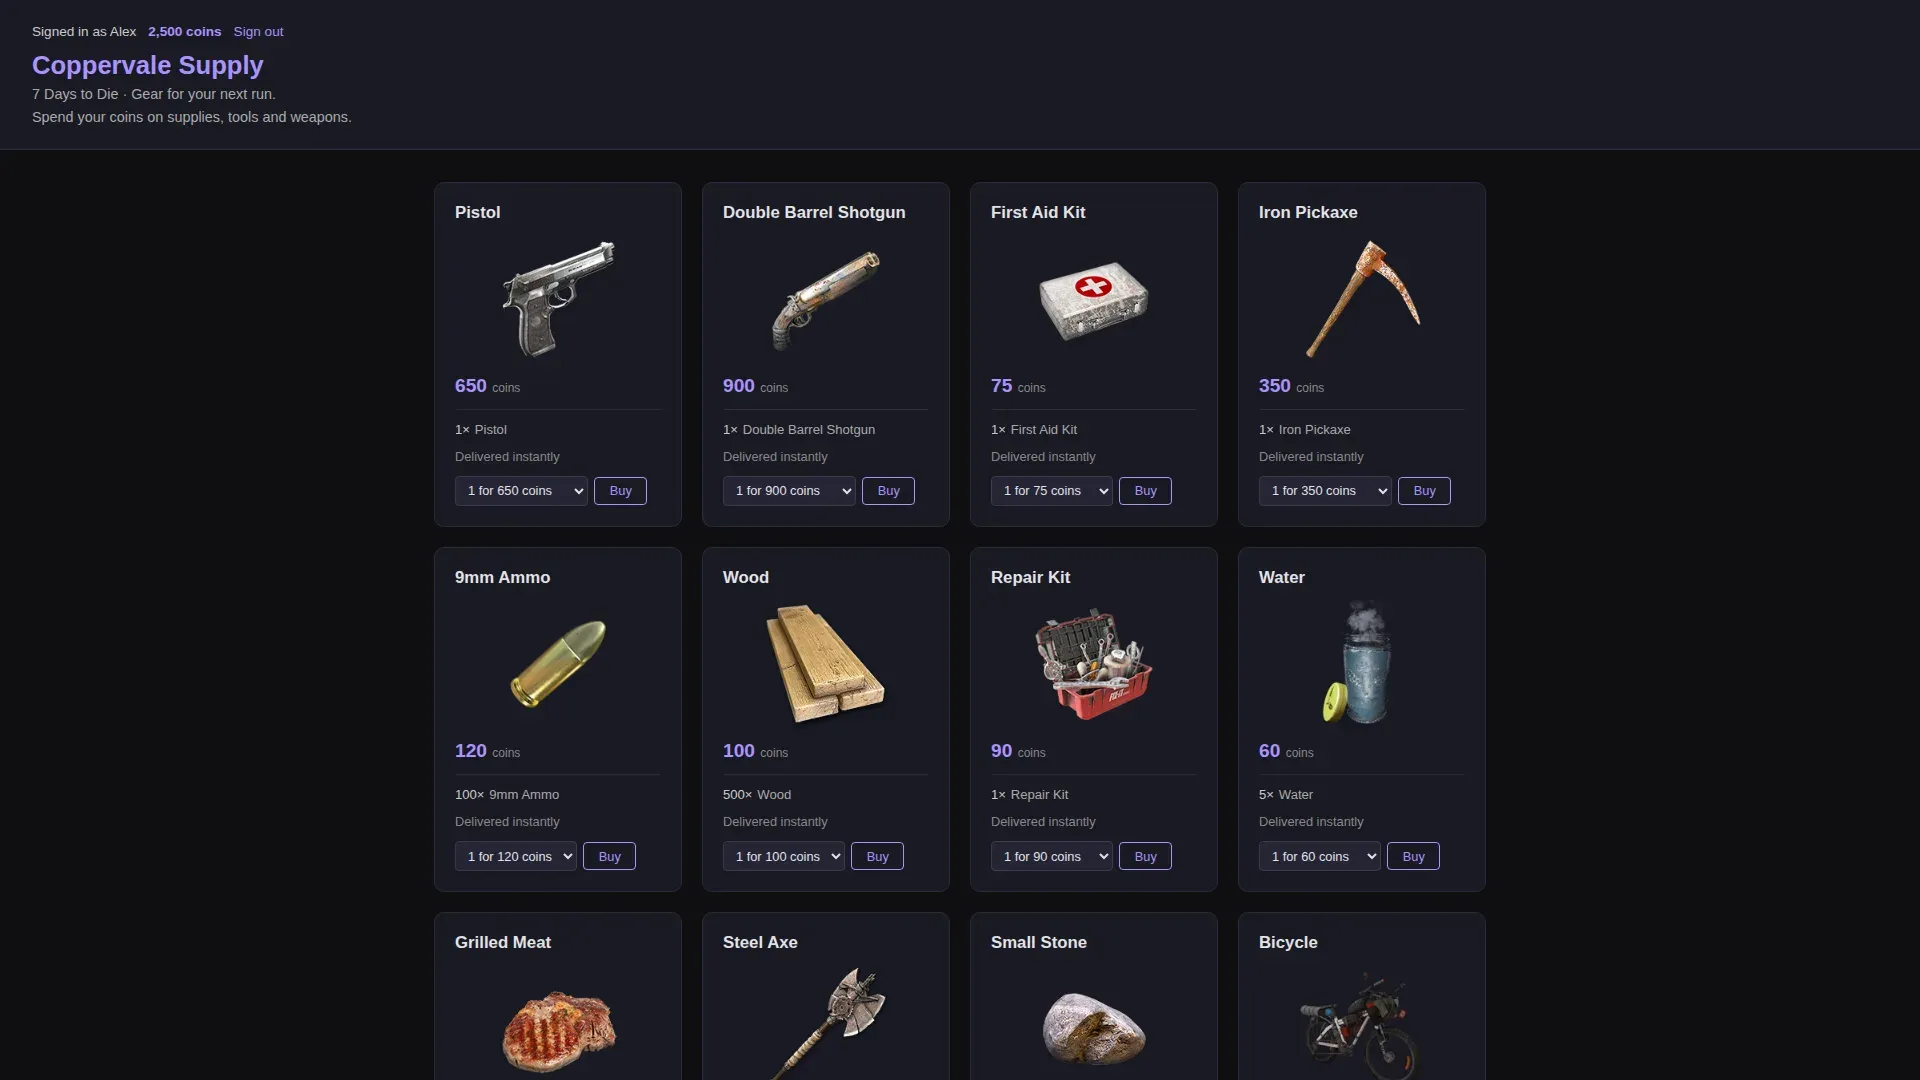
Section titled “The storefront”The storefront is your shop’s website. Players open it in a browser, sign in, see their balance and buy.
Open and share it
Section titled “Open and share it”On Shop → Storefront, click View storefront or Copy storefront link. Share the link in your Discord or on your website.
Change its look
Section titled “Change its look”Shop → Storefront settings:
- Pick a template: Default, Scrapyard, Showroom, Arcade, Hearth or Terminal.
- Fill in its options. Show preview shows the result.
- Click Save. Saving publishes your storefront.
Set the address
Section titled “Set the address”Under Storefront address on the same page, choose:
- A name of your own, like
your-shop. Takaro tells you if it’s Available, Taken or Reserved. - Your own domain, like
shop.example.com. Point it at Takaro with a CNAME record, then click Check DNS. It shows Verified when it works.
The address covers every server in your community. Visitors see a list of your servers and pick one.
How players sign in and link
Section titled “How players sign in and link”Before a player can buy, Takaro has to know which in-game player they are. This is called linking.
- On the storefront, the player clicks Sign in.
- They link their in-game player: with Steam (automatic), by typing
/linkin game, or with a code from the Player Portal.
Once linked, the player sees their balance and their orders on the storefront. For the step-by-step for players, see How players link themselves.
In game
Section titled “In game”With economyUtils installed, players can browse with /shop and claim orders with /claim.
Open your server, then Items.
Catalogue
Section titled “Catalogue”Catalogue lists every item Takaro knows for this server’s game, with its Name and Code. Takaro gets the list from your game server. Use it to check an item’s code or to find an item for a listing.
Item sets
Section titled “Item sets”An item set is a saved list of items, like a “Starter kit”. Use it to give or sell the same items again in one go.
- Items → Sets → New set.
- Give it a Name and add items with a Qty and Quality.
- Click Save.
Where you can use a set:
- Load set in a shop listing, or in the Give Items dialog for a player.
- In module settings that ask for an item set.
To reuse a set on another server, click Copy to servers…. This works only for servers of the same game. Items that don’t exist on the target are left out.